Enrolling and Provisioning an SSL Certificate With Let’s Encrypt
 23 Jul 2025
Goal
This guide will walk you through securing a web application with an SSL certificate issued by Let’s Encrypt, using Apache HTTP Server as a reverse proxy.
|
Note
|
While this guide uses AWS EC2 as the example, the same steps apply to any Linux-based server, whether hosted on a different cloud provider or on a self-managed machine. |
Prerequisites
-
You have an Amazon Linux (AMI) EC2 instance running your web application.
-
The application exposes HTTP traffic on a specific port (e.g.,
8000)
Solution Overview
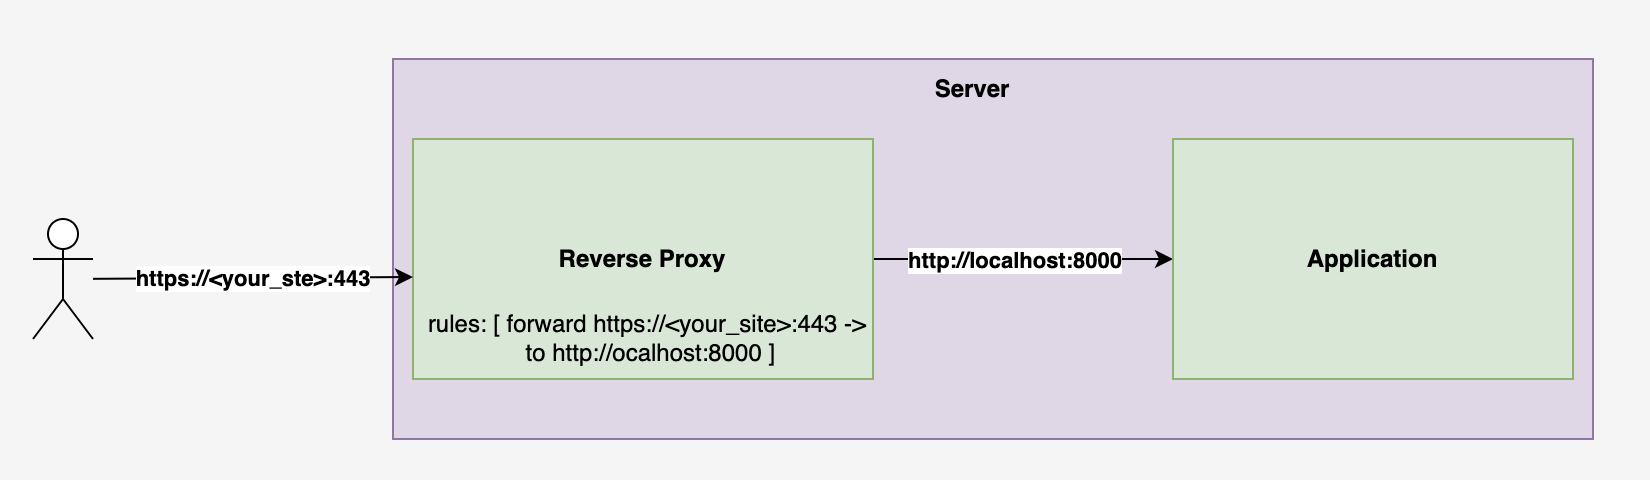
The most common way to secure your application with an SSL certificate is to introduce a reverse proxy in front of it. The reverse proxy exposes a HTTPS endpoint and forwards incoming traffic to your application’s HTTP port.
Step 1: Configure EC2 Security Group
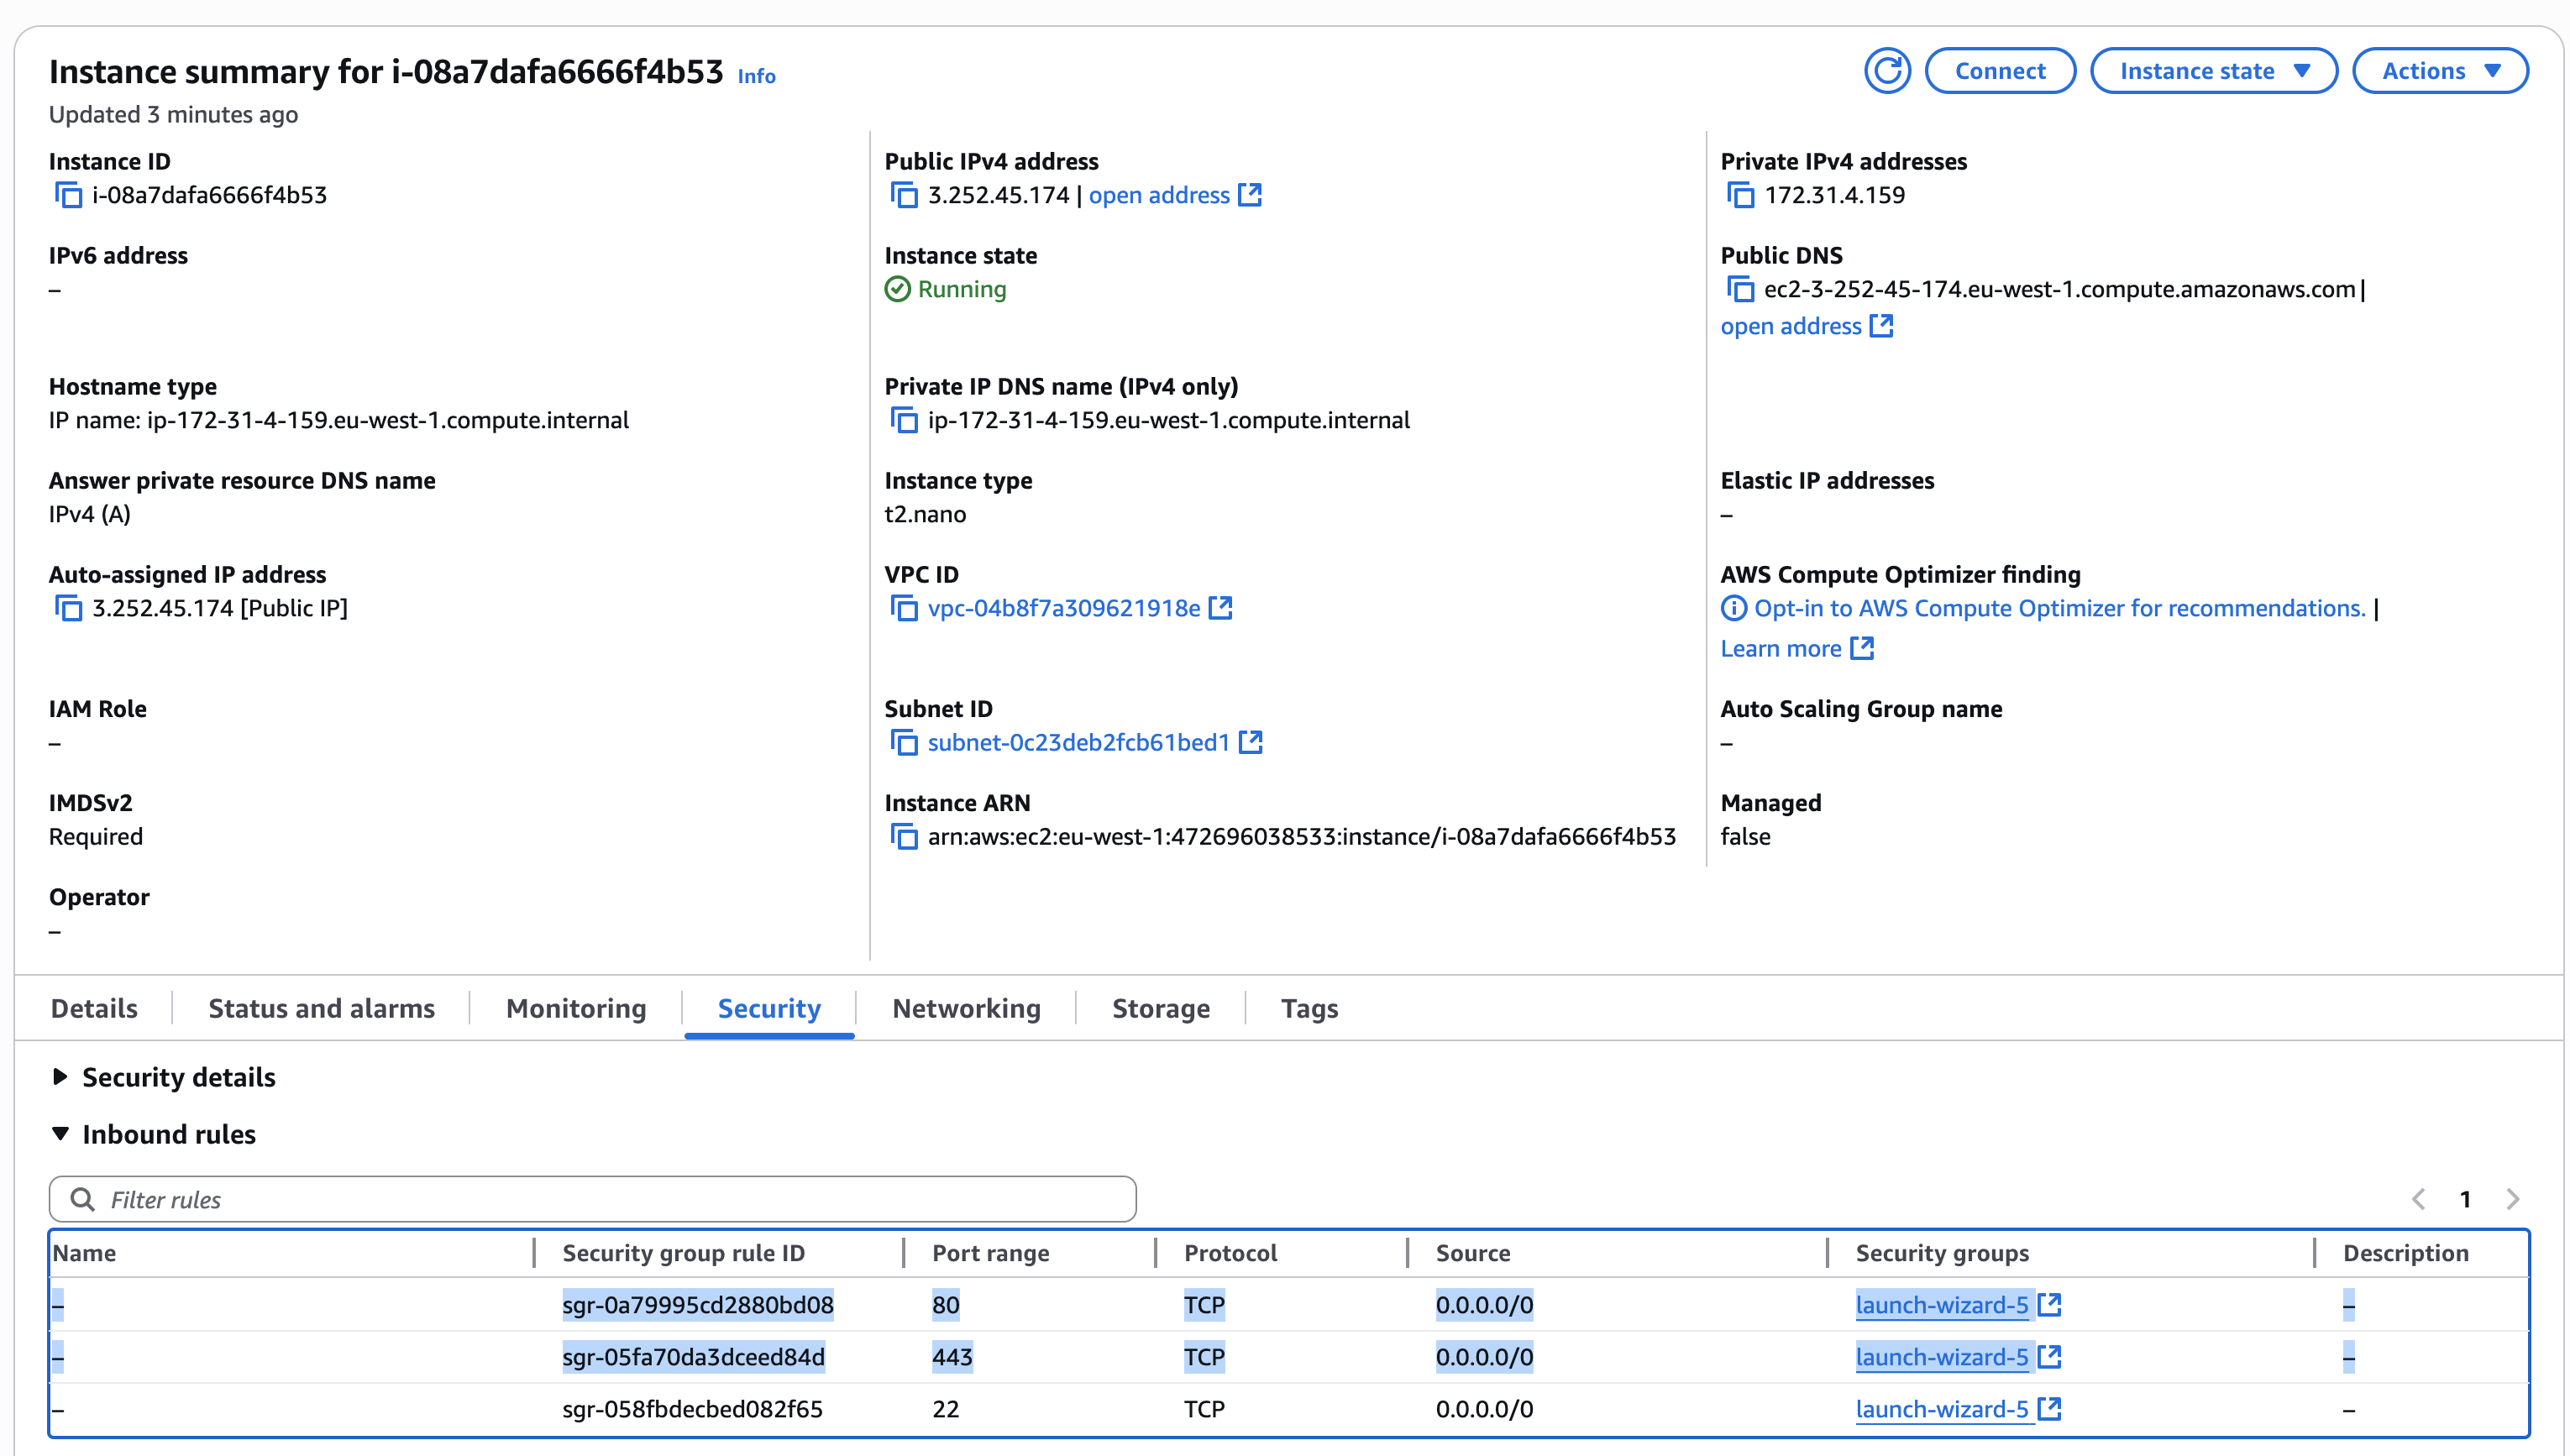
Update the inbound rules of your EC2 instance’s security group to allow:
-
TCP port 80 (HTTP)
-
TCP port 443 (HTTPS)
Step 2: Register a DNS Record
Use your domain registrar (e.g., AWS Route 53) to create a DNS record pointing to your EC2 instance. Example:
ssl.ltpu.net -> 3.252.45.174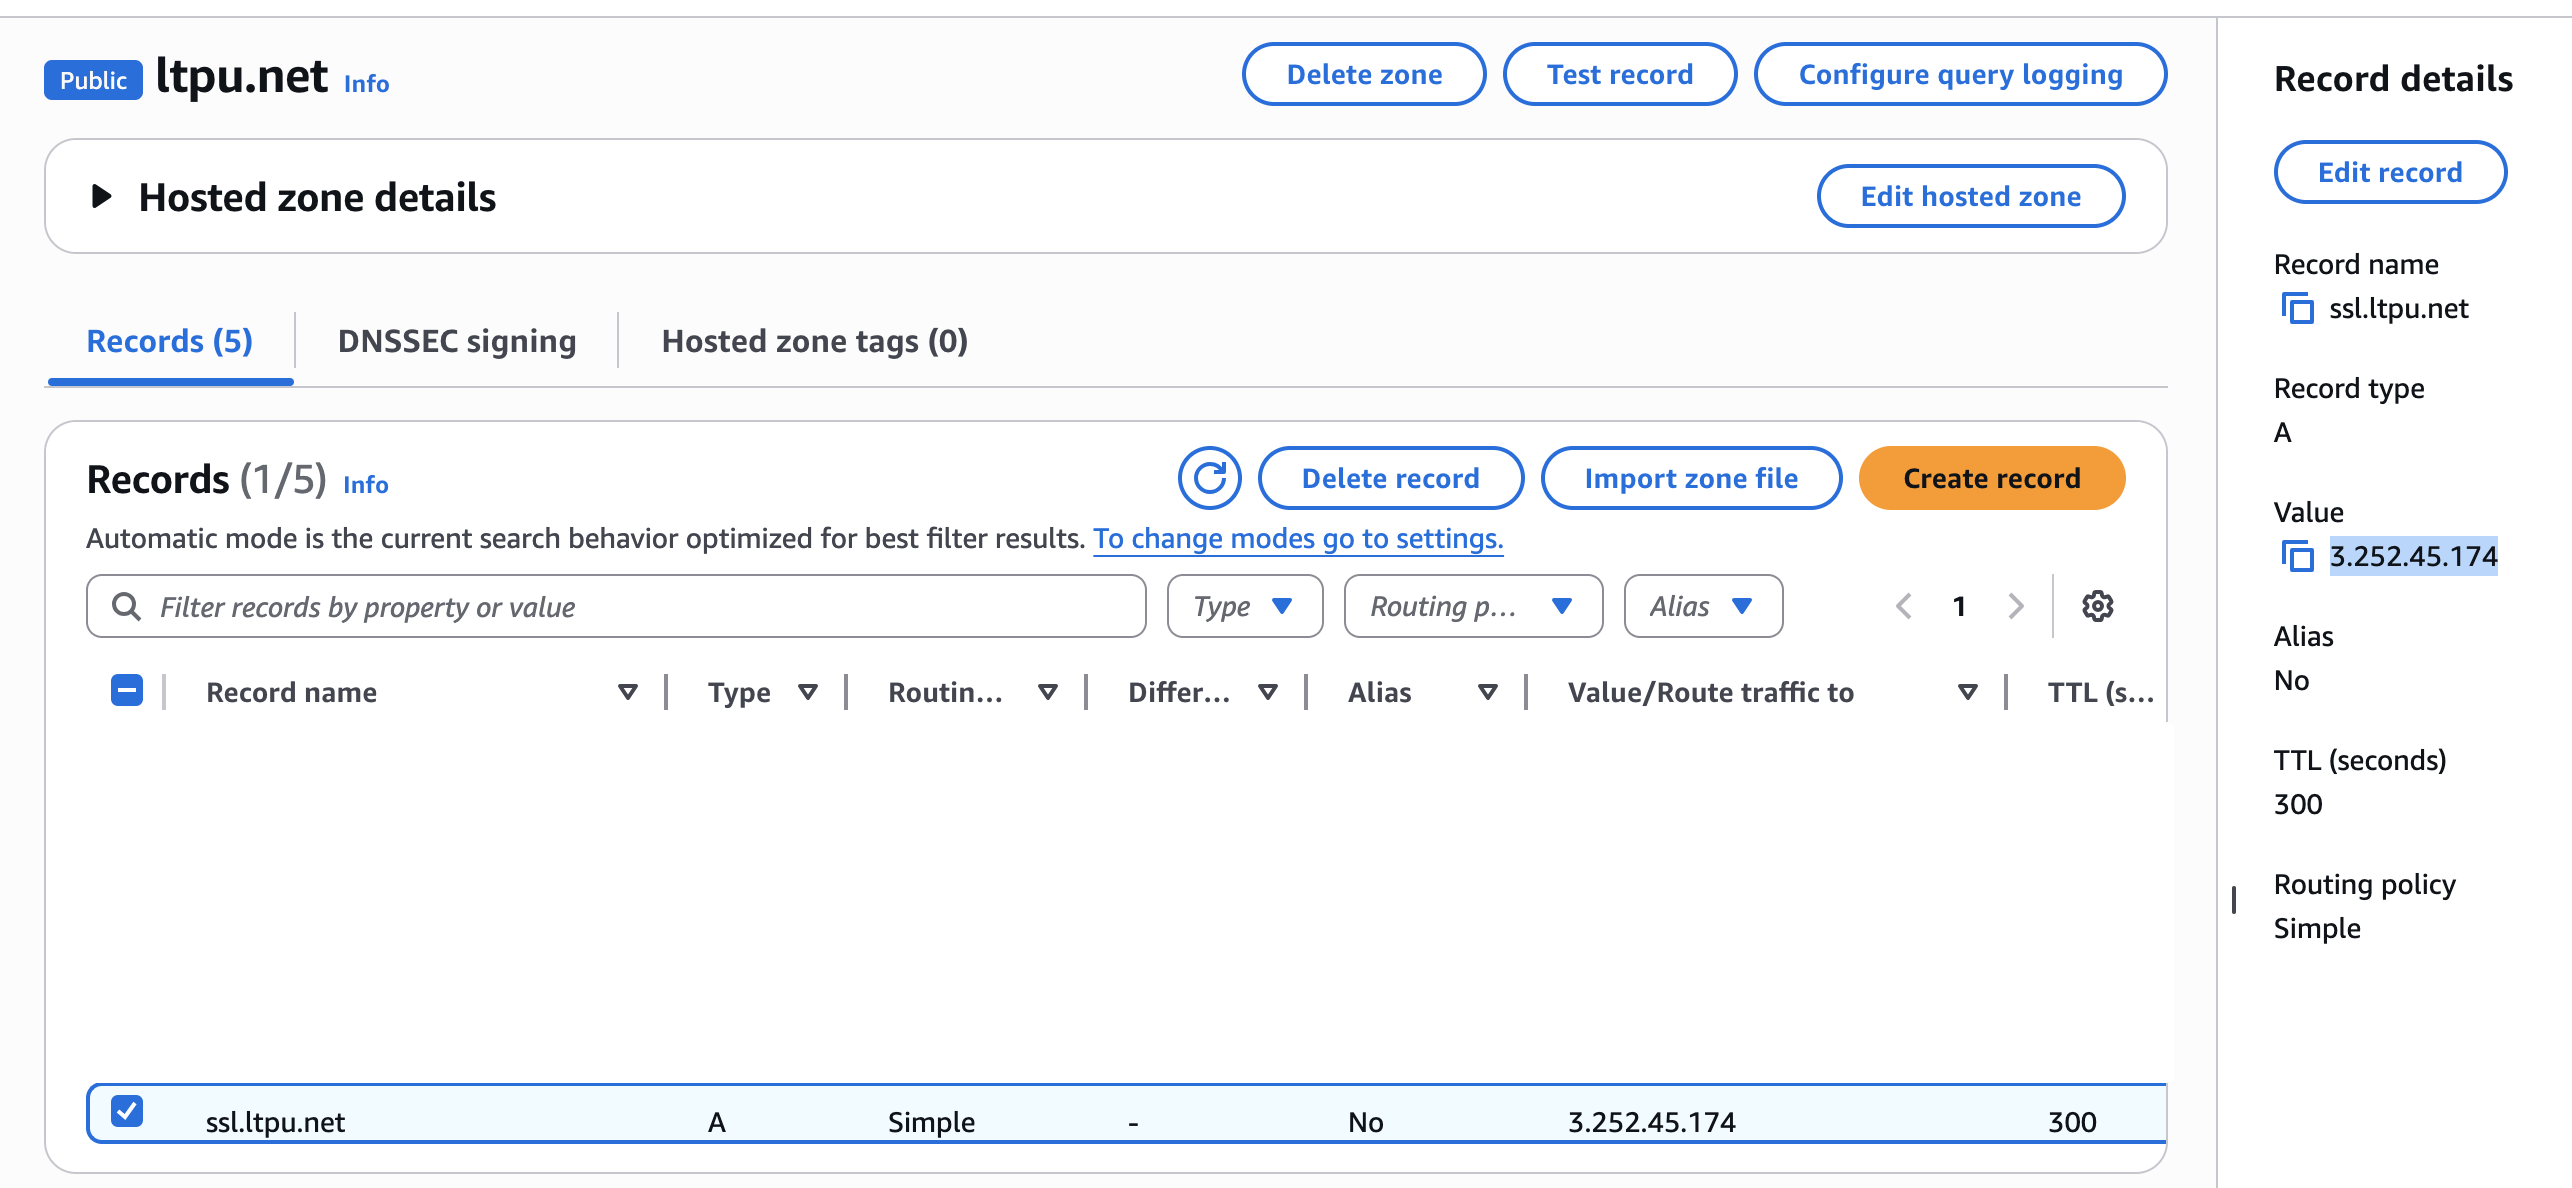
Step 3: Install and Configure Apache HTTP Server
We’ll use Apache Http Server (httpd) as a reverse proxy.
SSH into your EC2 instance and run the following commands:
sudo yum install httpd -y
sudo systemctl enable httpd
sudo systemctl start httpd
Verify it’s working:
curl localhost:80Expected output:
<html><body><h1>It works!</h1></body></html>Now configure Apache to forward traffic from port 80 to your application (running on localhost:8000).
Edit the Apache config:
sudo vi /etc/httpd/conf/httpd.confAdd the following block after Listen 80:
<VirtualHost *:80>
    DocumentRoot "/var/www/html"
    ServerAlias "forward"
    ProxyPass / http://localhost:8000/
    ProxyPassReverse / http://localhost:8000/
    RewriteEngine on
</VirtualHost>
Restart Apache:
sudo systemctl restart httpdVerify that the proxy is working:
curl localhost:80This should now return the output from your application running on port 8000.
Step 4: Enroll and Provision SSL Certificate
Let’s Encrypt is a free certificate authority provider.
We’ll use Certbot to request an SSL certificate from Let’s Encrypt.
Install Certbot and its Apache plugin:
sudo yum install certbot -y
sudo yum install certbot-apache -y
Run Certbot:
sudo certbotProvide the requested info: email, domain name (ssl.ltpu.net), etc.
If successful, you’ll see a message like:
Deploying certificate
Successfully deployed certificate for ssl.ltpu.net to /etc/httpd/conf/httpd-le-ssl.conf
Congratulations! You have successfully enabled HTTPS on https://ssl.ltpu.net
Visit your https endpoint (https://ssl.ltpu.net) to verify the setup.
Step 5: Configure Auto-Renewal
Let’s Encrypt certificates are valid for 90 days. To automatically renew them, install cronie:
sudo yum install cronie -yEdit the crontab:
crontab -eAdd the following line to renew the certificate every 10 days:
0 0 */10 * * sudo certbot renewCertbot will email you if the certificate is about to expire or is renewed.
Summary
In this guide, we’ve:
-
Installed and configured Apache as a reverse proxy
-
Enrolled an SSL certificate from Let’s Encrypt
-
Enabled HTTPS on an EC2-hosted web app
-
Set up automatic certificate renewal
Your application is now securely accessible over HTTPS.
Comments
Leave a comment